
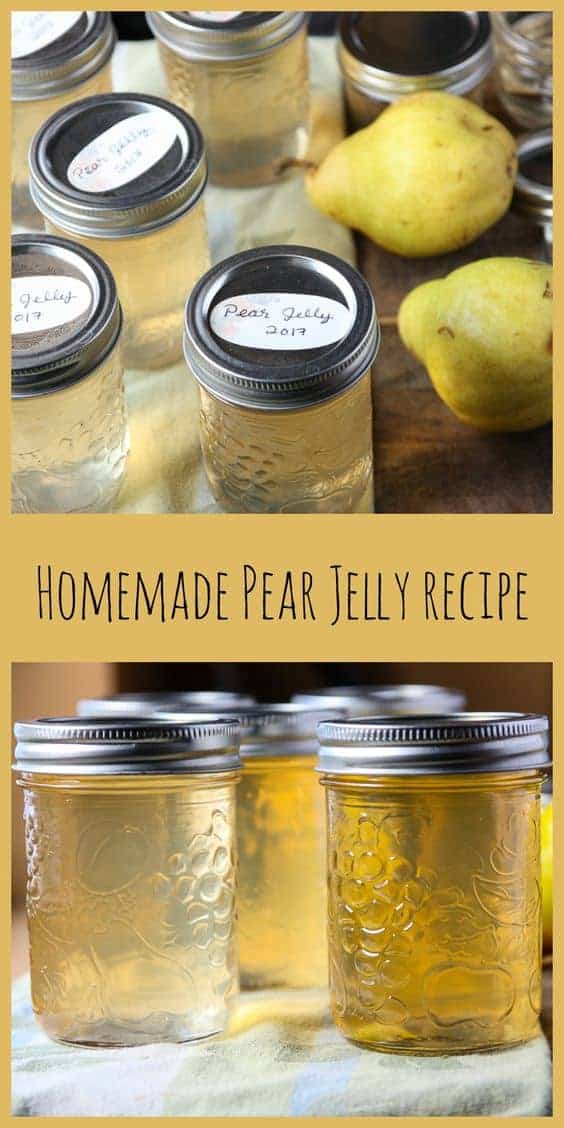
Pear Jelly was the perfect way to use up the rest of the pears that were slowly ripening in a bag by my back door. We had a lot of pears, and you can only eat so many. After giving a lot of them away, and making Pear Gorgonzola Bites, some muffins and lots of salads, I still had a lot of pears. This jelly used them all up. Which is good, because when they all get ripe at once, there's just no way we could eat them all.
Want to save this recipe?
Enter your email & I'll send it to your inbox. Plus, get great new recipes from me every week!
Jelly Making vs Jam Making
I've made a lot of jam, but always hesitated to make jelly because it seemed complicated. What with having to extract juice from the fruit first. The first time I decided to tackle jelly making was Grape Jelly from our homegrown grapes. From there I made Pepper Jelly from garden peppers, and now I make both every year. It turns out that there's nothing complicated about jelly making. There is, however, a little passive time involved while you wait for the juice to extract. And passive time means you can get some other stuff done. (or not).
When making jelly, you use the whole fruit, skin and all, because the skin contains a lot of the fruit's pectin. So there's a little less effort required when it comes to peeling, coring, and chopping than if you were making jam.
If you want to make some jelly, The Old Farmer's Almanac has some great info and tips. How to Make Jelly. This recipe comes from the Bernardin Complete Book of Home Preserving, which has over 400 recipes.
This Jelly is Not Just For Toast
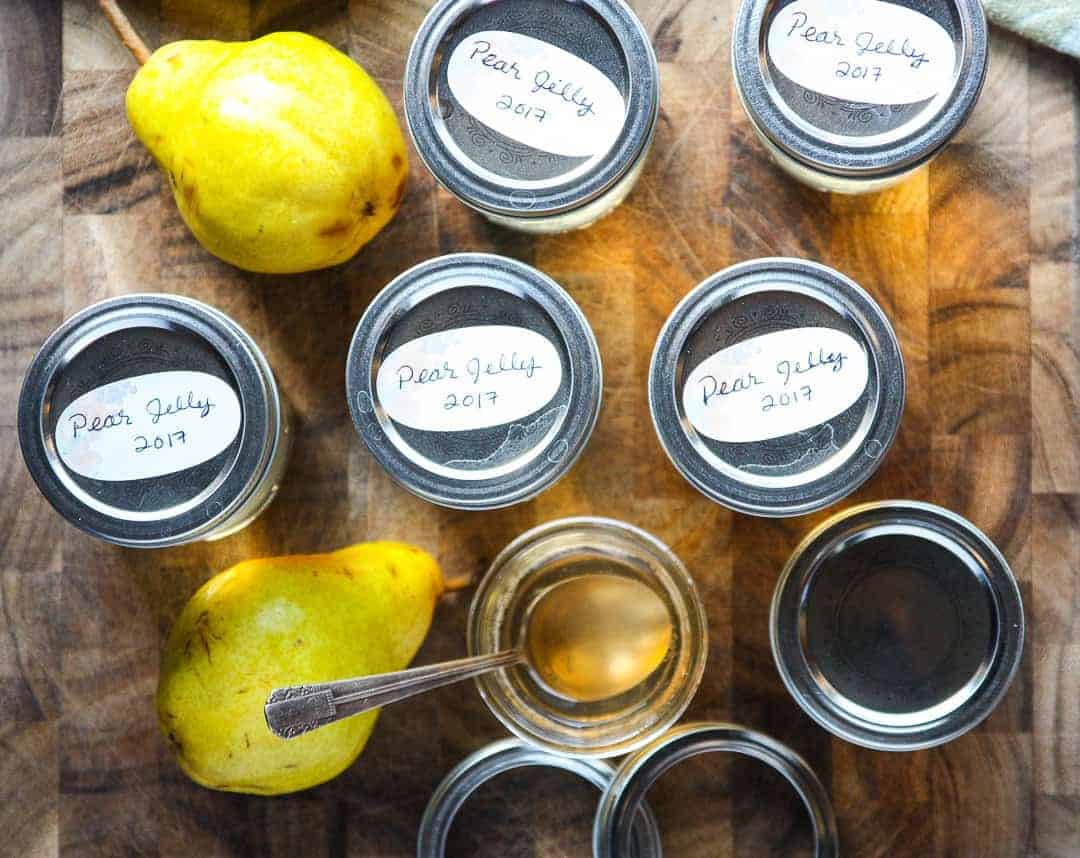
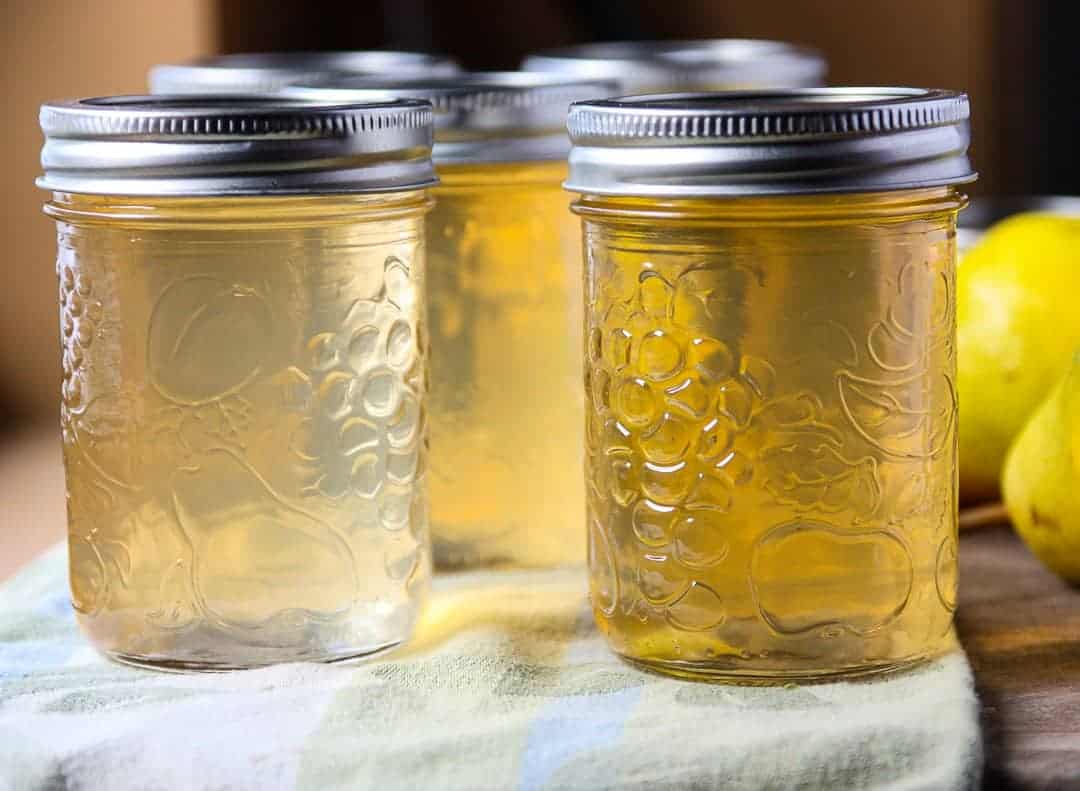
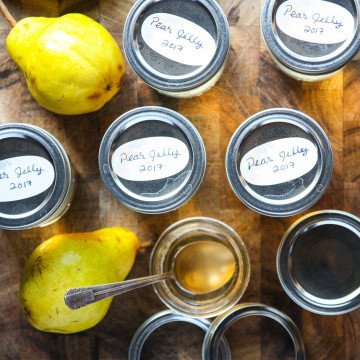
I love the jewelled colours of little jars of jelly, all lined up neatly in the pantry. And they make great homemade gifts, too. Besides just toast, you can use this pear jelly as a glaze for meat or poultry. It also makes a great Asian style dipping sauce when mixed with some soy sauce and rice vinegar. Toss it, along with some balsamic vinegar, on winter squash before roasting. It's delicious stirred into plain yogurt or hot oatmeal, too.
Recipe
Want to save this recipe?
Enter your email & I'll send it to your inbox. Plus, get great new recipes from me every week!
Pear Jelly Recipe
Ingredients
- 8 lbs ripe pears
- 7 ½ cups granulated sugar
- 1 pouch 85 ml liquid pectin
Instructions
- Wash pears and remove the blossom and stem ends, but do not core or peel them
- Cut pears into quarters and place in a large, deep stainless steel pot.
- Add enough cold water to cover the fruit
- Bring to a boil over high heat, stirring occasionally, then reduce heat, cover and boil gently just until pears are softened, about 30 minutes, occasionally mashing with a potato masher
- Transfer to a dampened jelly bag set over a deep bowl, or into a sieve lined with several layers of dampened cheesecloth.
- Allow to drip at least 2 hours.
- Don't press or squeeze the fruit, as this will cloud the jelly.
- You should end up with 5 cups of pear juice.
- Combine the collected pear juice and sugar into a large, deep, stainless steel pot.
- Bring to a full rolling boil over high heat
- Stir in liquid pectin and continue to boil hard, stirring constantly, for one minute
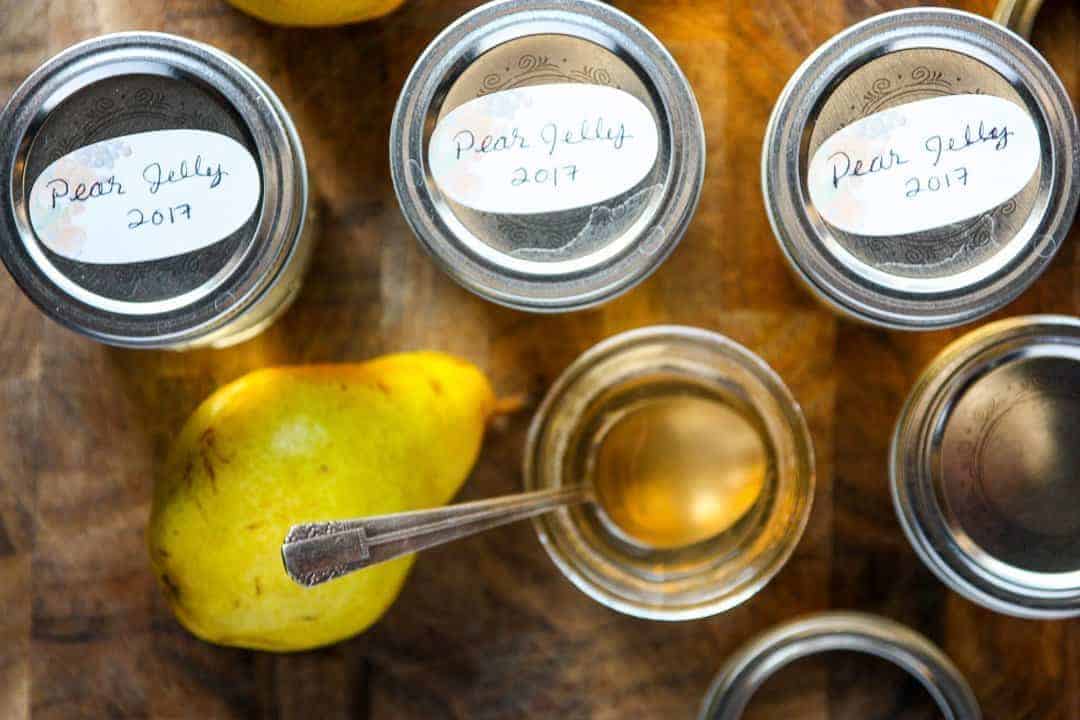
- Skim off foam and transfer to hot sterilized jars
- Wipe jar rims and apply lids and screw bands
- Process in a boiling water canner for 10 minutes
- Remove from canner and allow to cool before ensuring jars are sealed and storing.
Notes
Nutrition

Monica says
I followed this recipe exactly. Made 36 jars of pear jelly and not a single one set! 😔 Pectin was well within date and everything. What went wrong?
Colleen says
Hi Monica. I never recommend doubling or tripling the recipe when making jellies and jams. This recipe yields 4-6 jars typically. To make 36 jars you would need to increase the quantities of pears, sugar, and pectin by 6x. This would lead to a much longer cooking time, and disrupt the reaction of pectin and sugar that produces a gel. It's better to make separate batches. Another possible cause could be overripe pears. The pectin content in the pears decreases as it ripens. I'm sorry it didn't set for you. You can try one of the solutions here to possibly rescue it. How to fix jelly that didn't set
Monica Craig says
I guess I should have clarified that I made four separate batches and each one of my batches made nine half pints. I did not double or triple the batches.
Colleen says
Thanks for clarifying, Monica. It still seems like a lot to yield nine half pints for this recipe. I can't troubleshoot more than thinking you may have had very ripe, juicy pears.
Judy says
I used exactly 8 pounds of pears and added just enough cold water (5 cups) to barely cover the pears and ended up with 14 cups of juice, not 5! The juice is dark and very sweet even without any added sugar. Do I use only five cups of juice at a time for 7.5 cups of sugar and 1 pouch of liquid pectin? I’m concerned that the end result will be too sweet…
Colleen says
Hi Judy, that's a lot of juice! Your extra juicy pears will give you a big yield. Yes, I recommend that you do it in batches as per the recipe. Since your pears are very sweet, I would try reducing the sugar with the first batch to see if it will set. If it does, you're good to go. (One reader did leave a comment here that he reduced the sugar and it was a success). Good luck, and it would be great to hear back how it went!
Linda says
Question - when transferring the cooked pears to a sieve to drip, do I scoop them out of the water they were cooked in, abd discard that water?
Colleen says
Hi Linda, thanks for this question. Just transfer it all, including the water, to the sieve. Enjoy the pear jelly!
Linda says
I put 7 lbs of pears in a pot, covered them with water, cooked for 20-ish minutes, then strained. Would up with 14 cups of juice, not 5. So now, do I scale up the sugar and pectin to match the amount of juice? I worry that I nay have put in too much water.
Theresa says
Does it have to be liquid pectin?
Colleen says
Hi Theresa, for this recipe, yes you do need liquid pectin.
Emma says
I just got done making this recipe, I did a double batch and it sure made I lot. I have 19 half pint jars filled. Now let's hope it sets 🤞🤞
Colleen says
I hope the jelly turns out great, Emma! I haven't tried doubling the recipe so would love to hear how it went!
Donna Shipp Horita says
I cannot figure out what I've done wrong! My "jelly" has a beautiful color, but it is pear syrup!! I'm so sad. I even opened all the jars this morning, added more pectin, cooked it a lot longer and washed and replaced the lids with new ones......still liquid!
Colleen says
Hi Donna. I'm also so sad that your jelly didn't set. There are many variables that come into play for homemade jelly to set. The recipe should always be followed exactly, a timer should be used, and the pectin used should not be expired. But sometimes, it isn't about anything that you did wrong. Mostly, it's about the fruit itself, it's ripeness, the growing conditions, and the variety. Sometimes, in spite of doing everything right, it just doesn't set. It happens to us all. You can reprocess jelly that failed to set. You can find instructions to do it here: http://www.pickyourown.org/how_to_fix_runny_jam.htm. Keep going, wishing you jelly success!❤
Patsy says
Hard when humidity is high also, its a pain here in Florida! 😭
Bob says
Made some yesterday. It gelled nicely overnight and the jelly has a deep amber color. Really very pretty. Temperature, temperature, temperature. I only used 2/3 of the sugar called for so we taste the fruit and not sugary Easter candy. I brought the syrupe to 225F before it began snotting off of a cold spoon. Without all the extra sugar the pear taste really comes through. Yum, Yum.
Colleen says
Hi Bob, it's good to know that it worked out for you with less sugar. I do have to say though, that the original recipe does taste like the fruit and not at all like sugary Easter candy. Thanks for sharing your experience.
Debbie says
So yours did gel? I made elderberry last year and followed the diections. Seemed like so much sugar and IMO I agree it is so sweet almost inedible. I tasted this as I added the sugar and when it got to a great flavor with the pear still coming through I quit. Now I am just waiting and hoping it gels
Heather says
Can I freeze the jars instead of can it?
Colleen says
Hi Heather, I haven't tried it with this recipe, but I think you could freeze the jelly once it is set.
Brenda A. says
When I make jelly I have found using my nuwave cooktop for two years and it seems to give even amount of heat and have not had a single jar to not gel. Of course it was strawberry jelly and blackberries both fresh. I have not make pineapple pear jelly in years am anxious to try this recipe. Will let you know how it turns our, I usually use a fresh pillow case never slept on and pour juice thru it then extract my juice. If I am tired use a large jar and into refrigerator. Mason has huge jars that work great for holding the juice until you cook it.
Colleen says
Hi Brenda! Thanks for the tips. I love the pillowcase idea! And I would love to hear how it turns out. Happy Jelling!
Richard says
About how long after the jars seal for it to jell
Colleen says
Hi Richard, Usually the jars seal pretty fast after being removed from the water bath. The jell will happen as the jars cool.
Brenda A. says
Almost at once and some overnite. It will not gel until it cools, but run a spoon in it to see if it has started to thicken it will likely gel for you.
Sharon L Penny says
HELP! I tried altering the recipe bc I only had 1 lbs of pears. Only added 1 1/2 c of sugar. After full boil, I added I pkg sure-jell mixed in c of water, lemon juice and brought to another rolling boil. Now I only have liquid bc it didn't jell. Can you advise how to make it to jelly from here,
Colleen says
Hi Sharon, that's a lot of changes to the recipe. I think the important one is that liquid and powdered pectin are not interchangeable. There are other factors too, including how ripe your pears are, how long it was boiled, and the amount of sugar used. Also check your pectin as it does have an expiry date. You can re-try bringing it to a boil with more pectin. Be sure to boil it hard for one minute. Good luck!
Val says
How many jam jars does this yield?
Colleen says
Hi Val, thanks for this question. My yield is 5 half pint (8 oz) jars. Depending on the size and ripeness of your pears, you can expect between 4 and 6 half pint jars. I have updated the recipe to reflect that.
Kathy Shelton says
I made the jelly yesterday. Added 2 cinnamon sticks to the pears while cooking. That was the only change. This was my first jelly and I was very excited with the results. My two youngest grandkids came by about the time I was pulling it out of the water bath. The 6 year old told me she didn’t like pears however the 4 year old must have made it look good. I did not process the small amount that didn’t fill the jar so we had samples. Now she does like pears!
Turned out a beautiful color and very clear
Thank you for sharing this recipe
Colleen says
Hi Kathy! I'm so happy that your pear jelly turned out great. I love the addition of cinnamon sticks! And how nice to have little samplers show up just in time. Thank you for letting me know; I appreciate it!
Robyn says
I’m curious how 8 cups of water and the juice from the pears only yields 5 cups of drained liquid. I followed the recipe as written and got much more than 5 cups. I’m concerned the jelly won’t set.
Colleen says
Hi Robyn, the instruction is to add enough water to cover the pears, which for the size of my pot, and my pears, is about 1 cup per pound. I'm thinking that may sound a bit misleading, so I am going to take that out. However, as long as you use enough sugar and your pectin is not expired, AND you cooked and boiled for the exact times in the recipe, (I use my oven timer) it should set!